Gingered(end of)Summer Squash Soup

So tasty!!!….I am still fighting this crud! I needed something warm and soothing for my throat, spicy enough to kill whatever’s left, and delicious enough to keep me happy. Sick all week meant there was only what was left after 10 days in the fridge and that was one lonely little Summer Squash and some cherry bombs…this soup came together SO QUICK…. Easily a new favorite irregardless of summer OR sickness.

Delicious.

gingered-summer-squash-soup

Gingered (end of) Summer Squash Soup

Wheat-Free, Gluten-Free

1 large onion, coarsely chopped

1 clove garlic, minced

1 large yellow summer squash

1/4t chipotle powder *optional

1 fresh jalapeño or cherry bomb pepper, chopped

1/2″ piece of fresh ginger

3T coconut oil

6c boiling water

2t raw agave

1 vege bouillon

1t salt or to taste

1/4c cashews

handful fresh parsley

Bring 6c of water to a boil.

Place the cashews, ginger, agave and parsley in a blender and set aside.

In a large soup pot, add the oil and sauté the onions and garlic until golden and soft and aromatic. Add the yellow squash, the boullion (or powder) and the salt. Continue to sauté until the squash softens and turns bright yellow- about 3-4 minutes.  Add the boiling water to cover. Bring to a rapid boil and reduce heat and simmer for 2-3 more minutes.

 —

In batches, in a blender or vitamix*, transfer the soup pot contents into the blender and puree the soup with the contents in the blender. Adjust the seasonings if needed.

*Caution: blending hot liquids can be extremely dangerous. Fill the blender only half way and proceed in batches if necessary.

Advertisement

Simple Turmeric Broth

broth

Simple Turmeric Broth for Vegetable Noodle Soup 2016

6c water

½ onion, coarsely chopped

2” fresh ginger, grated

1t turmeric

1t sesame oil

1t pink salt

Put everything in a pot, and bring to a boil. Reduce heat and simmer for 5-10 minutes.

Strain the broth through a fine mesh sieve into a large heatproof pitcher (I use my Vitamix container) or bowl. Discard the vegetables. Pour the broth back into the pot and then proceed to add fresh veggies, cooked rice noodles. This is the simplest, clear broth and it is just so easy and perfect for a pick me up or when you are not feeling full force to sip on.

Blueberry Coconut Kefir Love Bomb Lassi

*Blue coconut kefir love bomb

Summer berries…I can’t get enough…this smoothie is also filled with belly loving probiotics, if you don’t have vegan kefir on hand, you can sub a non-dairy milk or a fruit kombucha for the  liquid (mango or berry is amazing). It has an incredible tangy-ness that is so delicious, reminiscent of a Fruit Lassi and is my go to beverage post Hot Yoga.

Coconut Kefir Blueberry Love Bomb Lassi

1c fresh or frozen blueberries

1c prepared almond kefir or cashew milk

1T chia seeds

1t raw honey or 1 date

3/4c raw coconut yogurt

1c ice

Blend all ingredients together except the ice and process until smooth- taste and adjust if needed

Add the ice and process just until smooth.

Stewed Summer Tomatoes

Stewed Summer Tomatoes

Stewed Summer Tomatoes

10 tomatoes (roma or plum), split length wise in 1/2

2 teaspoons salt

1 small onion, medium dice

1 clove garlic, sliced

2T extra virgin olive oil

1 cherry bomb pepper, sliced *optional

3-4 large leaves of fresh basil

1-1/2c boiling water

Heat up a large cooking pot; add the olive oil and onions and sauté just until translucent. Add the garlic slices and tomato halves to the onions. Cover with hot water. Bring everything to a boil and then reduce the heat to medium to medium-low and continue to cook uncovered for 30 minutes or so. The tomatoes should remain intact. Allow to cool for at least 30 minutes if not using right away to store. Remove from the pot to a jar or glass container and while still warm, add the fresh basil. If eating immediately, add the fresh basil in at the end before serving and drizzle with more salt and olive oil.

Serve fresh or you can freeze them. I eat them over crusty bread as a snack hot, warm or cold. I also use them to make a delicious dish; Baked Pasta with Stewed Tomatoes. AMAZE.

Chocolate Marshmallow Power Smoothie

Chocolate Marshmallow Smoothie

Tastes like chocolate marshmallows….not kidding…

Chocolate Marshmallow Power Smoothie

1c hemp nut milk

2T chia seeds

1t raw agave or raw local honey

2T raw Coconut Manna

2T raw cacao

1t vanilla

1 scoop vegan protein powder

2-3 cashews

1c ice

Blend all ingredients together except the ice and process until smooth- taste and adjust if needed

Add the ice and blend just until smooth.

Sundried Tomato & Ramp Cheese Spread

*sundried tomato & Ramp Cheese Spread

Seriously… NOT F*CKING AROUND….what a flavor on this cheese!!!! Ramps are only here for such a short time! What a way to celebrate their uniqueness and honor their presence. I had the opportunity to forage for ramps with my friend on her hillside- what a divine way to connect with the planet….spring has finally sprung.

Sundried Tomato & Ramp Cheese Spread

2c cashews, soaked for an hour (this step can be skipped)

1T mellow white miso

3 capsules vegan probiotics (empty powder and dispose of the capsule) or 1t powder

1/2c +up to 3T filtered water

2t onion powder

1/4c sundried tomatoes in oil- just the tomatoes, minced (I used Bionatura’s)

1/2t pink salt

1/4c coconut oil

3t lemon juice (omit if fresh is not available)

6 whole ramps, green & white minced

Step 1.

In a Vitamix or high-powered blender, add the cashews (drained if soaked), the probiotic powder, miso and 1/2c of water.

Blend this at a lower speed initially to well incorporate the contents, speed up the motor as it gets blended. You will need to process this for at least 4-5 minutes until the cashews are absolutely creamy. Scrape down the sides intermittently and be sure to get all possible ‘pieces’ of cashews blended into the mix. Add a T of water as needed if the mixture gets stuck. If you run this too fast, the contents will heat up, creating an oily mixture.

When totally creamy and smooth, remove to a glass or stainless steel bowl and set in a safe, warm place- I place mine in the dehydrator uncovered at about 100 degrees and let it run overnight. You could also in lieu of a dehydrator, place it in a warm spot in your kitchen, loosely covered. Leave this overnight or for 24 hours.

Step 2.

Mix in the salt, onion powder, sundried tomatoes, ramps, coconut oil (should be room temp and soft, not liquid), and lemon juice. Transfer to a container and place in the fridge for at least 6 hours to set, best, overnight. It becomes a beautiful, spreadable, creamy cheesy bit of awesomeness.

Plain Sour Cashew Cream

Plain Sour Cashew Cream

Ummmmmm. It’s Sour Cream. SOUR CREAM. Just made out of cashews…not animal milk.

This. Makes me. Happy.I just had my hands on junky store bought vegan sour cream that was filled with crap. THIS..is not.

Hello Onion Dip, baked potatoes, plain yogurt, you get where I’m going….. Oh. And its RAW and filled with pro-biotics.

Plain Sour Cashew Cream

1c cashews, soaked for an hour (this step can be skipped)

5 capsules vegan probiotics (empty powder and dispose of the capsule) or 1t powder

3/4 +up to 3T filtered water

1/2t pink salt

1T lemon juice (omit if fresh is not available)

Step 1.

In a Vitamix or high-powered blender, add the cashews (drained if soaked), the probiotic powder, water.

Blend this at a lower speed initially to well incorporate the contents, speed up the motor as it gets blended. You will need to process this for at least 3-5 minutes until the cashews are absolutely creamy. Scrape down the sides intermittently and be sure to get all possible ‘pieces’ of cashews blended into the mix. Add a T of water as needed if the mixture gets stuck or if the mixture seems to thick. If you run this too fast, the contents will heat up, creating an oily mixture.

When totally creamy and smooth, remove to a glass or stainless steel bowl and set in a safe, warm place- I place mine in the dehydrator at about 100 degrees and let it run overnight. You could also in lieu of a dehydrator, place it in a warm spot in your kitchen, covered. Leave this overnight or for 24hours.

Step 2.

Mix in the salt and lemon juice. Transfer to a container and place in the fridge for at least 6 hours to set, best, overnight. If this set up thicker than desired, add a little bit of water to loosen it up to the desired consistency.

Scallion Cream Cheese!

Vegan Scallion Cream Cheese

There are no words for the amount of awesomeness this recipe creates. It is truly amazing. I dare anyone to taste this and know the difference between this and a real dairy cream cheese. You can find acidophilus powder but be sure that is a vegan sourced strain. You would sub 1t for the 5 capsules.

Scallion Cream Cheese!

2c cashews, soaked for an hour (this step can be skipped)

1T mellow white miso

2 capsules vegan probiotics (empty powder and dispose of the capsule) or 1t powder

1/2c +up to 3T filtered water

2t onion powder

1/2t pink salt

1/4c coconut oil, soft

2t lemon juice (omit if fresh is not available)

4 scallions, green & white minced

Step 1.

In a Vitamix or high-powered blender, add the cashews (drained if soaked), the probiotic powder, miso and 1/2c of water.

Blend this at a lower speed initially to well incorporate the contents, speed up the motor as it gets blended. You will need to process this for at least 4-5 minutes until the cashews are absolutely creamy. Scrape down the sides intermittently and be sure to get all possible ‘pieces’ of cashews blended into the mix. Add a T of water as needed if the mixture gets stuck. If you run this too fast, the contents will heat up, creating an oily mixture.

When totally creamy and smooth, remove to a glass or stainless steel bowl and set in a safe, warm place- I place mine in the dehydrator uncovered at about 100 degrees and let it run overnight. You could also in lieu of a dehydrator, place it in a warm spot in your kitchen, loosley covered. Leave this overnight or for 24 hours.

Step 2.

Mix in the salt, onion powder, coconut oil (should be room temp and soft, not liquid), lemon juice, and minced scallions. Transfer to a container and place in the fridge for at least 6 hours to set, best, overnight. It becomes a beautiful, spreadable, creamy cheese like bit of awesomeness.

Perfect Gluten Free Pumpkin Pie

Gluten free pumpkin pie

This pie is DELICIOUS. I mean, seriously good. Serve it up with some Coconut Whipped Topping or a side of vegan vanilla ice cream…..I love love love this pie. Happy Holidays!!!!

Perfect Gluten Free Pumpkin Pie

The Filling:

1 1/3c pumpkin puree (1 15-ounce can or cooked pumpkin puree)

1/4c maple syrup

1/4c maple sugar

1/2c unsweetened cashew cream (1/4c cashews/ 1c water blended)

1T coconut oil

2t pumpkin spice (or choose a mix of allspice, clove, ginger, cinnamon & nutmeg)

2T Kudzu root (blended in the cashew milk)

2”piece of fresh ginger

1/2″ piece of fresh turmeric

1T fresh lemon juice (omit if fresh is not available)

1/4t pink salt

1t vanilla

The Crust:

3T cold vegan butter

3T cold coconut oil

1-1/4c Bobs Red Mill GF All Purpose Flour, or your favorite GF mix.

1/4t pink salt

3T maple sugar

4-6T ice cold water

Prepare the Pie Crust:

You can make both the filling and the crust ahead of time- the crust you can make a day or two in advance and keep in the fridge. If you are preparing in one day, make the crust, chill it and then prepare the filling. Your dough should be ready to roll out after about 30 minutes in the fridge.

 Sift the GF flour, sugar, and salt into a large mixing bowl. Add the cold butter and oil in 1T scoops and cut the oil into the flour using two knives or a pastry cutter. The end result should look like a sandy crumb or meal. There should not be any large chunks of oil; you want smallish bead sized bits of fat encased in the flour.

Add ice water 1T at a time using a wooden spoon to mix it in, grabbing the flour as you go. Only add as much water as you need to help it come together to form a ball.

Once a loose ball of dough is formed, transfer onto a piece of plastic wrap and work gently with your hands to form a ½” thick round. Wrap firmly and chill for a minimum 20 minutes, you can prepare and store for up to 2 days. Let it  warm back up a little before using but not quite to room temp. You don’t want it too warm or it can get too soft to handle.

I uniformly press the hell out of it into the pie plate and then let it set for 10 minutes prior to filling.

Prepare the filling:

In a blender or vitamix, make the cashew cream (1c water/ 1/4c cashews) and pour 1/2c of the cream into a small glass.

Add the kudzu root and mix with a spoon until most of the root is dissolved. Add this into the blender with the rest of the ingredients.

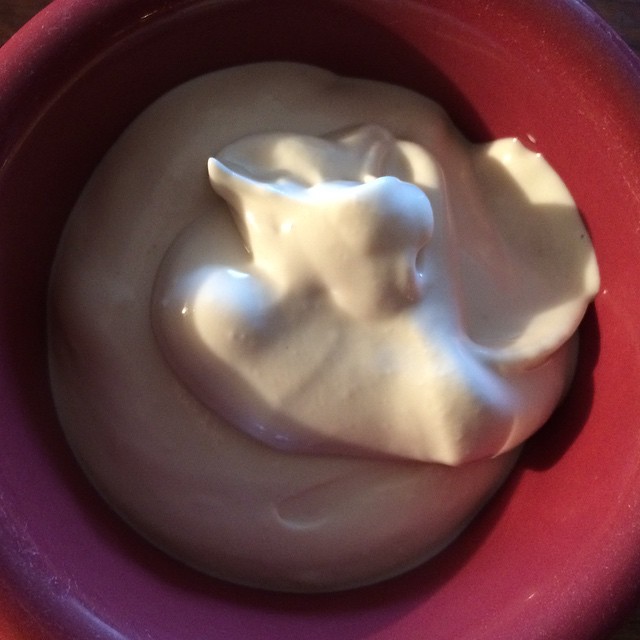
In the same blender, add the all of the ingredients including the kudzu cashew cream slurry. Blend until completely smooth and creamy- taste it and adjust the flavors (more vanilla, more sweet, more ginger, more spice etc.). Set aside and roll out your dough.

To roll out the crust, unwrap the disc and place it between two sizable layers of wax paper (plastic wrap will work OK, but is a little more difficult to work with). Use a rolling pin to gently roll it into the shape of your pie pan. It will crack, don’t worry, you will mostly be pressing this into the pie plate with your hands- you just want to get the dough as thin as possible before hand. Any holes or cracks you can patch with no problem.

To transfer the crust, remove the top layer of wax paper and gently lay the pie dish face down on top of the crust and use the support of the wax paper to quickly but carefully flip it as center as possible over the pie pan.

Once in the pan, gently use your hands to form it into the pan, working the crust up along the sides. Try to get the pie up as uniformly as possible all around. You can leave a straight no fuss edge or I like to make a curve design by pressing my right knuckle in between the pie dough and my left pointer finger knuckle and thumb.

Pour the filling into piecrust and bake for 45-55 minutes, or until it smells and looks done. The crust should be golden brown and the filling will still be just a bit soft and have beautiful cracking on the top. Remove from the oven and let cool completely before transferring to the refrigerator to set. Refrigerate for at least 4-6 hours, preferably overnight.

Romanesco with Lemon

I can’t get enough of this gorgeous alien looking beauty. It has a taste similar to cauliflower but it has it’s own uniqueness that is unrivaled. It is abundant locally now and I love love love it. Dressed simply to showcase its awesomeness.

Romanesco with Lemon

Romanesco with Lemon

1 head Romanesco, washed, trimmed, and cut into bite size pieces

1 lemon, juiced

2T extra virgin olive oil- more if desired

1/2t salt

1/4t black pepper

1c water

In a large pot, heat up the cup of water until boiling. Add the Romanesco and steam for 7-8 minutes or until bright green and tender. Drain, reserving the cooking liquid for veggie stock.

In a bowl, add the steamed Romanesco and then the olive oil, lemon juice, salt and pepper and gently toss. Serve either warm or cold. Delicious both ways.