Fresh Tomato Tofu Vegetable Lasagna

*fresh early fall lasagnaAgain, not a difficult dish to make at all, it’s all about the components- each one is full of flavor prior to joining forces in this early fall, late summer time fresh lasagna. I used brown rice lasagna noodles that are virtually un-dectectably different over wheat noodles so this lasagna is totally gluten free. I used only fresh tomatoes from the farmers’ market and a few of my own- some for the fresh sauce and others, sliced as a layer within the lasagna. What follows are the recipes for the components- how you layer it up is up to you! You can use different veggies; mushrooms, eggplant-  limitless possibilities. Mine was filled with tons of fresh basil, tomatoes, hot peppers, squash and spinach. I stayed away from using vegan cheese, was just not feeling it, so the tofu filling is an absolute stand out, delicious in flavor. I added a quickly sautéed garlic spinach into the filling to offer a fuller flavor (as opposed to just using it blanched or steamed), you can also simply use it as a layer. All of the vegetables were from my garden or from the Greenfield market.

Components:

  • 2 medium zucchinis- sliced and tossed in olive oil, salt & pepper
  • 6 cups spinach- quickly sautéed in garlic and olive, salt and pepper
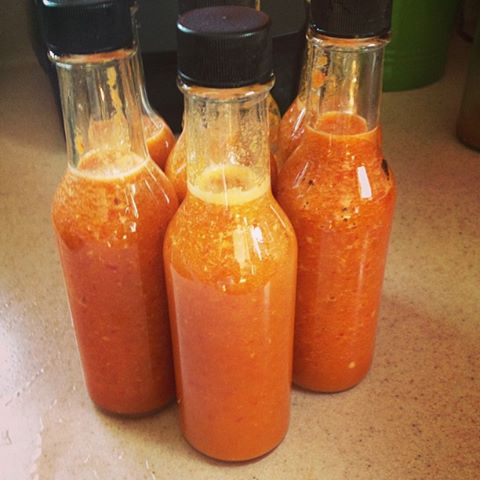
  • fresh tomato sauce- recipe below
  • 1 box of lasagna noodles, cooked
  • Tofu “ricotta” filling- recipe below
  • 1-2 larger tomatos, thinly sliced, drizzled with olive oil, salt and pepper

Putting it together:

  • Preheat the oven to 350 degrees
  • ladle in about 1 cup of fresh sauce in the bottom of the baking dish
  • place down one layer of noodles
  • layer in the tofu filling
  • layer in noodles
  • layer in fresh zucchini
  • layer in noodles
  • layer in fresh tomato slices, olive oil and salt
  • layer in last layer of noodles
  • cover the top layer with fresh sauce
  • Cover with tin foil and bake for 60 minutes.

Fresh Tomato & Basil Sauce

2 cloves garlic, smashed and minced

4c tomatoes, diced

1/4c fresh basil, lightly packed, chopped

1/4t black pepper

1/4c water

1/2-1 fresh cherry bomb, chili or other hot pepper, minced

1/3c extra virgin olive oil

1t salt or to taste

In a skillet, add the olive oil and sauté the garlic  until golden and soft. Add the tomatoes, parsley, salt, black and red pepper. Allow the tomatoes to break down and to come to a boil. Reduce heat and simmer for 5-10 minutes. In the last 5 minutes of cooking, add the fresh basil.

At this point, the sauce is delicious as is or can be pureed to create a smoother sauce.

Tofu “Ricotta” Filling

Tofu Ricotta /Crème

1Pound tofu- blanched- divided in 1/2

1 clove garlic

1 heaping T mellow white miso

3T extra virgin olive oil

1t brown rice vinegar

1t ume vinegar

1 heaping T sesame tahini

2T water if needed while blending

*opt 6c fresh spinach or 5oz- steamed and pressed (all water out) or sautéed with garlic and 1t olive oil

*opt 3oz Vegan mozzarella or favorite cheese

1/2t black pepper

In a blender or vitamix, place the warm cooked tofu (1/2), the miso, tahini, olive oil, vinegars, garlic, and blend until smooth and creamy.

In a bowl, crumble or mash the remaining tofu with a fork or fingers. Add the tofu crème, and the vegan cheese and the chopped steamed / pressed spinach.

Pan Fried Tempeh (made with Local Tempeh!)

*tempehdinnerI was in no mood to cook, I was relieved when I only needed to unscrew the cap off the bottle of wine….. However, I had left over quinoa in the fridge, a garden full of gorgeous kale and yesterday I bought a beautiful, unpasteurized, locally made, brick of tempeh, made by Hosta HIll at the Greenfield Farmer’s Market. Since finding out that Lightlife Foods, my favorite tempeh (and typically the only tempeh offered) has since been bought out by ConAgra (a GMO supported CORP), I haven’t been eating much tempeh- so when I saw it, I snapped it up. Cooked all in the same pan; first the tempeh, then the kale, then the quinoa- it made for a super simple and delicious Sunday night dinner. I ate it with some Sriracha sauce with a side of Buch and a glass of wine…..FRICKEN YUM.

Pan Fried Tempeh

1 package of tempeh, cut in half then sliced

1 clove garlic, smashed and minced

3T olive oil

1t fresh hot pepper *opt

Salt and pepper to taste

 In a hot sauté pan, add the oil and the garlic and sauté until just golden. Add the hot pepper and the tempeh and pan fry until golden brown, about 4-5 minutes. Flip to brown the other side.

You can vary the taste by pre-marinating the tempeh in flavors of your choosing.

 Serve as part of a simple meal with a grain (quinoa, rice) and green (kale, chard, cabbage) with a sauce of your choosing. I love Sriracha sauce or my homemade fermented Hot Sauce.

Fresh Tomato, Cauliflower & Basil Penne (GF)

*fresh tomato cauliflower pasta

Fresh Tomato & Cauliflower with Basil Pasta Sauce

1 small head cauliflower, cut and trimmed into bite size pieces

4 cloves garlic, minced

1 large tomato, diced

1/4c extra virgin olive oil

1/4c fresh basil, lightly packed, chopped

1/4t black pepper

1 small cherry bomb pepper, sliced

1t salt or to taste

1 Pound cooked pasta (can  be gluten free)

Steam the cauliflower for 5 minutes in salted water. Remove and set aside. (you can add this water to the pasta cooking water)

In a skillet, add the olive oil and sauté the garlic and sauté until golden and soft. Add the tomatoes, salt, black and red pepper. Reduce heat and simmer for 10-15 minutes (perfect pasta cooking time). In the last 5 minutes of cooking, add in the steamed cauliflower and sauté until heated through. Add the fresh basil just before serving. Serve over ziti, (gluten free) penne pasta or rotini and drizzle with olive oil and top with fresh basil and nutritional yeast.

#frickenyum

SAUTÉED SESAME KALE WITH GARLIC

 *KALE WITH SESAME

Fricken delicious. In 6 minutes you have fricken awesomeness. Serve with beans, tofu, tempeh, brown rice or quinoa etc. I ate mine with my fermented hot sauce.

Kale with Toasted Sesame and Garlic

1 bunch kale, washed, trimmed, and cut into bite size pieces

1 large clove garlic, smashed, minced

1T un-hulled sesame seeds (optional)

2T extra virgin olive oil

1t Toasted sesame oil

1/4t pink salt

crushed red pepper to taste

In a large skillet heat up the olive oil over medium high heat and sauté the garlic just until golden brown. Add the sesame seeds and pan toast for a minute or two. Add the salt, and red pepper, and then add the kale. With a fork or a pair of tongs, move the kale around the pan cooking the kale until wilted and tender. Add the toasted sesame oil in at the end of cooking and mix in. Serve immediately. Also good cold.

KOMBUCHA!

*kombucha

I have been wanting to share my passion for making Kombucha for a while now, so in lieu of a workshop, here is the written lesson. I love kombucha. I love making it, I love drinking it, I love everything it represents- to me it is a sort of guerrilla slow fermented food movement of health, wellness and culture- literally. The culture is called a SCOBY and there is lots of info out on the web about it’s amazing characteristics- for our purposes, this is the straight up recipe to get you going on your Kombucha trail blazing path. I have LOTS of SCOBY’s so if you are in the need for a Kombucha Start Up Kit (funnels, strainers, scoby and starter tea) email me. This will make 7 pints of Booch. I drink one a day so I am in the rhythm of fermenting, bottling, and then making the tea all over again, pretty consistently. I also always do a 2nd fermentation- meaning, the first time is just to ferment the tea, the 2nd ferment is flavoring and fizzing after the 1st ferment tea has been made (7-9 days).  After flavoring, I bottle it in glass bottles with a gasket tops to create fizz. I will describe my kombucha making process and if you should have questions, just post them.

What you will need to make 1st fermentation batch:

  • A healthy SCOBY
  • 1c starter tea (previously made from the last batch)
  • 5 tea bags- I use 2 black 2 green and 1 of a rose or pomegranate flavored tea
  • 12c water (4c hot water to brew tea, 8c cold once tea is brewed)
  • 1c sugar (I use organic sucanat or organic cane sugar)
  • label and marker

In a large tempered heat proof glass vessel, add the sugar, tea bags and water just to cover to steep, making a sweet tea mix. Once this has brewed, 5-7 minutes, remove the tea bags and pour the remaining cold water in. Add the starter tea and the SCOBY. Cover with a clean towel and secure the towel in place with an elastic band. On a label, mark the date and when you will be checking it. So for today, I marked 9/2 (the day I made the tea) and 9/11 (the day I will be checking it for doneness) Set this aside on the counter, out of the way or in a cabinet, and do not move or disturb for at least 7 days. As the tea ferments, it will be eating the sugar, so more days fermenting equals less sugar. It also tends to get a vinegary taste- some love, some not so much. I prefer mine in between so 8-9 days is how long I let mine go for. You can start tasting it after 7 days. It will also ferment more quickly in a hot space or in the summer months.

You can drink the tea as is. In order to do that, you will want to strain out the SCOBY, and the new baby SCOBY that this batch JUST made. (it will make one every time you brew! You can give these away, use then in addition to your mother SCOBY and make them stronger, some people blend them up and use them as a facial mask or you can simply compost them)

*When saving SCOBYS, save enough of the tea you just made to cover it, place it in a jar and in the fridge.

2nd Ferment, what you will need:

When my tea is done, I take out the SCOBYS and set them aside in a glass jar the tea they just made- they are ready for another batch of tea. This doesn’t have to happen immediately. You can leave them in the jar, in the tea, until you are ready to brew again.

I flavor my tea with organic freeze dried fruit, real fruit purees, frozen fruit- whatever you can get your hands on. You will note certain fruits enhance both the flavors and the fizz due to their sugar content. My favorite is to use freeze dried strawberries- this is especially awesome when my base tea has Rose flavored tea in it- SO GOOD. So I place the fruit right into the brew vessel, cover it again with the towel, and place a rubber band around the top to keep flies out. I let this stand overnight to mingle their flavors. The next day, I strain everything out and pour the flavored tea into bottles, lock the lids, date and label the bottles and let stand on the counter for 3-5 days. *CAUTION- contents under pressure can explode- this is especially true for brews with a higher sugar content. Start conservatively with your fermenting days, especially using glass bottles, until you get comfortable and into a rhythm.

I LOVE BOOCH.


Fermented Hot Sauce!

*hot sauce

This stuff is BOMB. I started making it last year and could not wait for this summer to roll around to plant all of the peppers I could to make it again. SO SIMPLE. You can use any variety of hot peppers, I use a mix of Hot Cherry Bombs, Cayenne, Jalapeño, and Chili’s. Depending on the kind of heat you prefer, you could totes add Scotch Bonnets and Habañeros to the mix for a hotter hot or add some sweet peppers to make it more like a homemade Sriracha Sauce. I also add in some fresh ginger, garlic in addition to the salt in the brine. I eat it on sandwiches, with tofu, just about anywhere I want a little kick in the pants. SO. GOOD.

You Will Need:

  • A glass jar with a gasket lock-tite lid
  • 2-3″ piece of fresh ginger
  • 3-4 cloves of fresh garlic
  • *Salt
  • 3-4c prepared hot/sweet pepper mix, de-stemmed and at least split so that the brine can penetrate the pepper
  • *Brine: Mix 1 heaped tablespoon of a mineral rich good sea salt, like pink or celtic sea salt, per quart water.
  • a small dish to weigh the peppers down once the lid is sealed to keep them under the brine

Hot Sauce

In the clean glass jar, start layering the peppers, ginger and garlic in, tightly packing them and also pounding them in to crush them somewhat.
Layer them tightly! You can salt as you go or you can pre-mix your saltwater brine and pour over the pepper mix.
Leave about 2 inches of space from the top. I use a little porcelain ramekin and close it down with lid onto the peppers (do this over the sink so as not to let what spills out spill all over!)

All of the goodness should be completely submersed under the brine.

THATS’ IT! I put this in my dehydrator, not on, so it can do it’s thing in a safe, warm, undisturbed place for at least two weeks.

After several days you will see bubbles start to happen- Don’t open the jar! TWO WEEKS.

After two weeks, in the sink, because the contents are now under pressure, carefully open the jar- You will most definitely get a POP.

Pour this directly into your food processor or vita-mix and puree completely with ALL of the brine included. If you need more liquid, you can add a little bit of raw apple cider vinegar to the blender. Bottle and store refrigerated. AMAAAAAAZINGNESS.

*hotsauce