The City’s Gone Nuts Granola

*Granola

I first made this recipe while I was living in NYC for my blog Slow Food In A Fast City, in a teeny tiny kitchen; I made it in my toaster oven. It is a super straight forward awesome granola recipe that is easy to modify by varying the nuts, adding dried fruits, and spices. This is my favorite taste combination, something about the almonds, cinnamon and vanilla that keeps me coming back to the original. I used black sesame seeds to add color contrast.

City’s Gone Nuts Granola

4 c GF rolled oats

1/3c coconut oil

1/3c maple syrup

1T ground cinnamon

1/2t sea salt (or less if desired)

1c almonds, coarsely chopped

2T black or white sesame seeds

2t vanilla

Preheat the oven to 350 degrees.

In a bowl, combine all of the ingredients and stir until well incorporated and the oats are coated.

Pour out onto a baking sheet (I had a super small convection oven so I did this in two batches- you could either do what I did, or ½ the recipe- unless of course you have an oven!)

Bake for 20-25 minutes or until golden brown and aromatic. Remove from oven and let cool on a rack. The granola will crisp up as it cools. Store in a cool dry place. DELICIOUS served with cashew nut milk as a cereal with fresh berries.

Curried Moong Dal Soup (Yellow Split pea)

*curried moong dal soup

Moong Dal is a traditional Indian pulse, it is a yellow split pea with the hull removed. It has a sweet and nutty flavor to it and makes a perfect addition to any vegan, gluten free diet as a quick cooking source of vegetable protein. This is one of my most favorite of the lentils. The soup cooks relatively fast and has a tremendous amount of flavor.

CURRIED MOONG DAL SOUP

 Wheat-Free, Gluten-Free 

1-1/2c moong dal, (yellow split peas) washed and drained

1 large onion, coarsely chopped

2t chipotle powder

1/4t black pepper

1/2t cayenne pepper

1 vegetable bouillon cube (or veggie broth to replace the water)

3T extra virgin olive oil

4c boiling water

1T mild curry powder

2t cumin powder

1t turmeric

1t salt or to taste

1/2c fresh cilantro, minced

Bring 6c of water to a boil in case you need more water

In a large soup pot, add the olive oil and sauté the onions until golden and soft. Add the salt, chipotle powder, black and red pepper and the other spices. Add the split peas, mixing them into the vegetables. Add the boiling water, the bouillon cube (or broth). Bring to a boil and reduce heat and simmer for 30-40 minutes. In the last few minutes of cooking, add in the fresh cilantro.

Serve with fresh cilantro sprinkled on top.

At this point, the soup is delicious as is or can be pureed to make a lovely, smooth, soup.

FOR PUREED SOUP:

In batches, in a blender or vitamix*, puree the split pea soup. Adjust the seasonings before serving.

*Caution: blending hot liquids can be extremely dangerous. Fill the blender only half way and proceed in batches if necessary.


White Girl Pho / Asian Noodle Soup

*asian noodle soup

This is a favorite go to soup. I LOVE the flavor of this soup. It reminds me of a macrobiotic soup I used to get in Los Angeles  at a restaurant called Inaka. They would use glass noodles, also gluten free. I use rice vermicelli, but glass noodles (mung bean noodles) or any other rice pasta of your choosing would be equally delicious. I adore the Japanese sweet yams, they are white in flesh color and subtly sweet. This is a fast, awesome, satisfying, winter treat.

Asian Noodle Soup

1 small onion, thinly sliced

1 clove garlic, smashed and minced

1 small carrot, thinly cut on the bias

1 stalk celery, thinly cut on the bias

1 honkin’ large handful of baby spinach

1/2 pound of tofu, cut into small cubes

1 small japanese yam or sweet potato, thinly cut on the bias

1t hot sesame oil

3T olive oil

2T Tamari

1” piece of fresh ginger, sliced or grated (slices can be removed, grated adds more flavor but floats around in the soup)

1/2 pound of asian style rice noodles

2 dried or fresh shitake mushrooms, thinly sliced

1t red chili flakes or 1/2 fresh hot pepper

4c hot water

1t toasted black or white sesame seeds *optional

salt and pepper to taste

In a heated soup pot, add the olive oil. Saute the onions, garlic and mushrooms until golden in color and aromatic. Add in the tamari, and the hot water.

Add in the sweet potato, fresh ginger, tofu cubes and bring to a low boil, reduce heat and simmer for 10-15 minutes or until the yams have softened. At this point, taste the broth, add in more Tamari if necessary, and also some salt and pepper.

 Bring the temperature up again to a low boil and add the hot sesame oil, the uncooked noodles, carrots and celery and cook just until the noodles are done through.

 In the last few minutes of cooking, add in the fresh spinach. Season if necessary.

Serve immediately.

Basic Brown Rice

*brown rice

Brown Rice

Brown rice is a whole grain. It is naturally gluten free and is a staple in my diet. Unlike white rice, brown rice has all of it’s goodness intact and thus contains a ton of nutrition otherwise lost in the refining process. Brown rice contains the highest amount of B vitamins out of all grains. Additionally, it contains iron, vitamin E, amino acids, and linoleic acid.

Brown rice is high in fiber, extremely low in sodium, and is composed of 80% complex carbohydrates. Because brown rice is a whole food, it takes longer to digest than white rice, providing the body with a sustained energy.

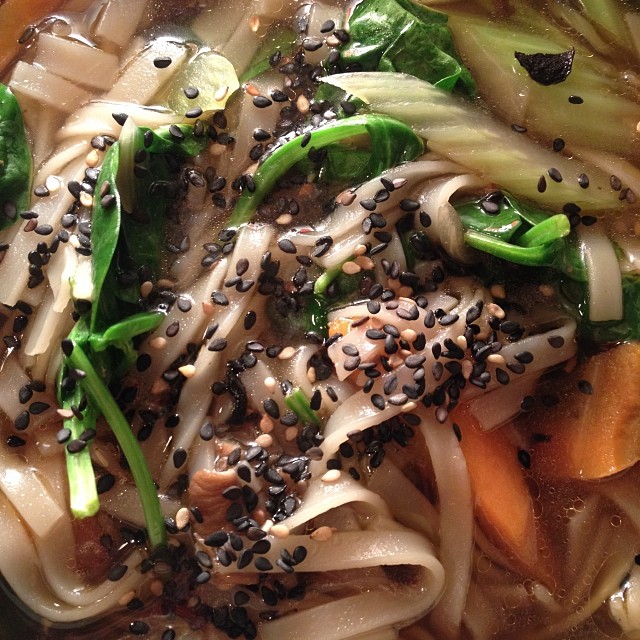
I make at least 4 cups (more if you are cooking for several peeps) of rice so I have plenty of rice for use during the week. Typically the first night I will eat the grains steamed, mixed with olive oil and nutritional yeast in addition to greens, tempeh, tofu beans etc. The following days, I can use any leftovers in soups or in stir-fries or bean loaves, it could also be re-steamed and/or re-heated.

Soaking Brown Rice
I soak my rice a day in advance, usually before I go to bed or 1st thing in the morning (at least 8 hours); I rinse, wash and drain as much rice as I would like to prepare and then cover the washed grains with fresh water and put that on the stove top or counter (covered to keep unwanted pests and dust out) over night, and cook the grains the following day or later that evening. I find the rice to be more flavorful but also more digestible when soaked. It also cooks about 10-12 minutes quicker than un-soaked rice. It is up to you whether you refresh the water or use the soaking liquid to cook the rice in.

Here is some more information about soaking vs. not soaking brown rice from Integrative Nutrition:

Phytic acid is a naturally occurring organic acid in the outer layer or bran. All grains contain phytic acid to some degree, but brown rice contains a relatively high level. When brown rice with untreated phytic acid enters the intestines, the phytic acid mixes with calcium, magnesium, copper, iron and zinc. The chemical reaction that takes place prohibits those minerals from being absorbed and utilized by the body. Some sources say that eating grains with untreated phytic acid will cause the body to lose bone mass and will eventually lead to overall mineral deficiency. However, soaking brown rice and other grains will eliminate the consequences of phytic acid by producing beneficial enzymes and raising the amount of nutrients present in brown rice. Others believe that un-soaked brown rice is healthier, as it stays in the digestive system longer than soaked grains, thus providing more energy.

The Benefits of Brown Rice

  • ·  Generates energy
  • ·  Promotes good digestion
  • ·  Quenches thirst
  • ·  Alleviates diarrhea caused by spleen-pancreas deficiency
  • ·  Relieves mental depression

 Buying & Storing

Look for quality brown rice that contains a small amount of green grains, I always purchase organic and store it in airtight glass jars in a dark cupboard. My go-to is short grain, however there are several varieties including sweet, long grain, basmati, jasmine etc. that will all vary in taste and tooth feel…I suggest finding your favorite! Short Grain Brown rice is a grain I always have in the house….ALWAYS….

Basic Brown Rice

Makes 3 cups 
Serves approx. 4

1c brown rice

2 cups of water or vegetable broth

1/2t pink salt

*Directions:

Place all ingredients in a pot with a tight fitting lid. Bring to a boil, reduce the heat  and let it cook uncovered for 5-7 minutes on a lower heat. I let about 2/3rds of the cooking liquid cook out uncovered and then when the water is barely visible in the pot, I lower the heat to it’s lowest setting and cover it. I find this helps from the sticky rice water from seeping out of the sides and making a mess, it also keep the rice from becoming water logged and soggy.

Cover and let simmer for 30-40 minutes, if you are not experienced with cooking rice, you’ll want to check on it about 10 minutes prior to the anticipated finish time so as not to burn the rice to the bottom (If you do burn it, it is okay, just try it again!)

Turn off the heat heat and let stand for at least 10 minutes. Fluff with fork and serve. One of my favorite ways of eating brown rice is to drizzle it with good extra virgin olive oil, nutritional yeast, salt and pepper and toss it all together well….DELICIOUSNESS

*May also be prepared in a rice cooker with the same ratio of ingredients.

Happy Gluten Free New Year with a Side of Yoga!

*30

I am kicking off 2014 with 30 days of YOGA and 30 days of being totally Gluten Free. I am also entertaining giving up alcohol but seeing as I have a compulsion towards extremes, I may not name that one, however, as of now I am 2 days in to no alcohol and several days in to no gluten and a  minimum practice of 30 minutes of yoga a day- in addition to my regular work out (spinning, running etc). I know my body does better without wheat…it just does. I feel less foggy, less tired, more clear. I think there are so many people running around with undiagnosed food allergies, I understand though, sometimes it is just feels easier to feel like shit than to really address what has to change for one to feel better…food is HUGE. Messing with one’s food…even bigger.

My thoughts going into this are to create a new and fresh repertoire of every day gluten free comfort go-to foods and treats and in that, establish a super awesome baseline of eating, kind of like creating a new habit of vegan, gluten-free deliciousness. I will do a lot of the food preparation myself, however, I will also try to document my take out and eat out meals as well- so far, my favorite places include a local authentic Thai place called Hattpon’s, a new Indian Restaurant called The Clay Oven, and my favorite Mexican Burrito place in town called Mesa Verde. I am still working out my Chinese and Japanese food options in and around Greenfield but am confident that there will be plenty of steamed mixed vegetables and Nori rolls in my future, even if I have to bring my own GF soy sauce (Tamari).

I have a tendency, as do many people on restricted or limited diets,  to fall into the path of least resistance, meaning; I eat a lot of packaged foods that state what they are or more evidently what they are not, i.e. vegan cheese, gluten free cookies etc….My hope is to create tons of delicious foods this month that are FOOD based, not label based, that are gluten free, dairy free, and animal free AND AMAZING (obvi). I AM SO EXCITED. #vegetablesrule

So much of how we approach our food is mental. I have seen it in my clients; those who want to lose weight, those who have been diagnosed with a food intolerance to wheat or dairy, and also my clients suffering from a more serious affliction such as diabetes or heart disease; the diet becomes more about what they CAN’T eat, not so much about what they CAN.

Bottom line, the most nutritious and beneficial foods are whole foods, mostly plant based, seasonal, local, and organic if possible. They do not come in wrappers, they are not made in a lab, they are not specially formulated off in some secret scientific kitchen somewhere- they are fruits, vegetables, and grains, you buy, grow or glean them and then cook and eat them.  #poweredbyplants

If you are down with coming with me, the basics of what you will need are:

Veggie Essentials

These are veggies that I try to always keep in the apartment. They are the basis of so many dishes, soups, and meals.

  • Onions
  • Garlic
  • Carrots
  • Celery
  • Fresh Ginger

Daily Veggies

These are the veggies that I shop for every other day or so, they usually star in the dish, or are a featured component in one of the recipes. They too, can be used to add into soups, meals, and juices- but I am looking and hoping to use them at their freshest- they are also the veggies that tend to spoil after 3-4 days- but can and still will be used. * I use all of my kale stems for juices, wilted spinach for soups or sautés etc.

  • Kale- all varieties
  • Baby spinach
  • Broccoli
  • Cauliflower
  • Cabbage- all kinds
  • Collards
  • Artichokes
  • Brussel Sprouts
  • Green Beans
  • Escarole
  • Lettuces

Stock Proteins

  • Peanut Butter and or other nut butters
  • Tofu
  • Tempeh
  • Beans (see Beans below for types) canned & dried

For your Shakes/ Smoothies/Superfoods

  • Chia Seed
  • Hemp Seeds
  • Raw Protein Powder (mine is fermented brown rice based)
  • Raw Coconut oil/butter or Coconut Manna (spread)
  • Raw Nuts of all kinds for milks, snacking
  • Acai Powder -*opt
  • Maca Powder *opt
  • Raw Cacao Powder *opt
  • *Raw Cacao Nibs * opt
  • Goji Berries *opt

Stock Cabinet Essentials

  • Extra Virgin Olive oil
  • Toasted Sesame oil
  • Himalyan Sea Salt
  • Black Pepper
  • Cayenne Pepper
  • Tamari
  • Ketchup
  • Maple Syrup
  • Agave Nectar
  • Mustard
  • Vegan Mayonnaise
  • Coconut Oil
  • Sriracha (asian hot sauce)
  • Brown Rice Pasta
  • Rice Noodles (asian markets)
  • Rice wrappers (asian markets)
  • Miso (goes in the fridge)

Stock Grains

  • Brown Rice
  • Quinoa
  • White Basmati Rice
  • GF Rolled Oats
  • Millet

Stock Beans

  • Chick peas
  • Red Lentils
  • Lentils
  • White Beans
  • Black beans
  • Kidney Beans
  • Green Split Peas
  • Moong Dal (yellow split peas)

Some tips going into this….Keep it simple. Don’t freak out. Set yourself up for success.

Come with.

Happy New Year.

XOEllen

#vegansdoitbetter

!

Chocolate Coconut Milk Moose

*gluten free chocolate coconut moose

This seriously takes like the inside of a Milky Way Candy Bar…..FRICKEN delicious.

Chocolate Coconut Moose

13.5 oz coconut milk (1 can)

1/3c water


1c chocolate chips

1T maple syrup

1/4t salt

1 1/2t agar

1t vanilla

Measure out all of the other ingredients and have them ready.

In a saucepan on the stove over a low to medium flame, combine the milk, chocolate chips, maple syrup, agar and salt, stirring frequently. Continue cooking over a low flame until the chocolate chips melt, about 10-15 minutes. The mixture should look like hot chocolate, creamy and full- bodied.

Place the contents of the saucepan into a blender. Caution, hot liquids in a blender can be extremely dangerous. Fill only half way to the top of the blender and proceed in batches if necessary. *
Add the vanilla and taste the mixture. Adjust the seasonings to your tastes. Make sure all of the adjustments happen before you pour it to set.

Pour the mixture out of the blender through a sieve, lined with cheesecloth, or through a very fine mesh strainer, into a large serving bowl. The straining will catch any lumps, clumps and/ or impurities (like uncooked agar).

To make individual servings, pour mixture directly into several, small, serving bowls
Allow this to cool and set for at least 5-6 hours, best overnight.

Serve with a nut crème and fresh berries.

Roasted Portobello Steaks with Lemon Spinach

*portobello steaks with lemon spinach

Roasted Portobello Steaks with Spinach

serves 2

 2 large Portobello mushrooms, brushed clean, remove the stems sliced and set aside

1 clove garlic, smashed and minced

1 large onion, thinly sliced

¼ fresh jalapeno or 1/4t red pepper flakes

1/3c olive oil

1/4c fresh parsley, minced

1/4c red or white wine

1/4c Daiya vegan cheese *so optional, not necessary

1/2t pink salt

1/4t fresh black pepper

4c fresh baby spinach

Pink salt and pepper to taste

1T olive oil

Juice of ½ lemon

 Preheat the oven to 425 degrees

In a large bowl, mix the garlic, onions, pepper, parsley, mushroom stems, wine, salt and pepper together. Gently slather the mushroom caps in the mixture, coating them well.

In a large roasting pan or dish, place the mushrooms topside down (gills up), be sure there is some of the olive oil mix underneath them. Then pour the remaining ingredients around the caps, well spaced.

While the mushrooms are roasting, prepare the spinach.

Using washed and dried spinach, toss the spinach until all leaves are well coated and seasoned with olive, salt and pepper.

 Place in the oven and roast for 20 minutes before flipping the caps and gently tossing the onions and stems around. Place the spinach around the mushroom caps and sprinkle the vegan cheese on the caps (if using) and place back into the oven for 5-7 minutes or until the cheese is melted and the spinach is just wilted.

For plating, make a small mound of spinach and drizzle with fresh lemon. Top it with the whole or sliced cap, topped with the onions and stem mixture

Penne Spinach “Lasagna” Casserole

*gluten free penne spinach lasagna

The premise of this super tasty dish is that is an easier, quicker, version of my traditional lasagna; it is more accessible as a casserole style baked pasta dish. My friends could not believe it was dairy free. Super cheese like, and could easily be made without the faux cheese if that is not your thing, simply omit it. It has the same basic components of a lasagna but the handling of the pasta goes much faster and delivers fantastic results.

Components:

  • 6 cups spinach- quickly sautéed in garlic and olive, salt and pepper OR blanched and pressed
  • fresh tomato saucerecipe below
  • 1 pound of Gluten Free Penne, Rigatoni, or Fusili
  • Tofu Spinach “ricotta” filling- recipe below
  • shredded non- dairy cheese of your choosing; Daiya (meltability factor), Follow Your Heart (taste factor), I use a mix of the two.

Putting it together:

  • Preheat the oven to 350 degrees
  • ladle in about 1 cup of fresh sauce in the bottom of the baking dish
  • place down one layer of pasta
  • spread in the tofu filling
  • layer in sprinkle with the shredded vegan cheese
  • layer in sauce
  • layer in pasta
  • spread in the tofu filling
  • layer in the last of the pasta
  • layer in last layer sauce
  • cover the top layer with shredded vegan cheese
  • Cover with tin foil and bake for 60 minutes.

Fresh Tomato & Basil Sauce

2 cloves garlic, smashed and minced

4c tomatoes, diced

1/4c fresh basil, lightly packed, chopped

1/4t black pepper

1/4c water

1/2-1 fresh cherry bomb, chili or other hot pepper, minced

1/3c extra virgin olive oil

1t salt or to taste

In a skillet, add the olive oil and sauté the garlic  until golden and soft. Add the tomatoes, parsley, salt, black and red pepper. Allow the tomatoes to break down and to come to a boil. Reduce heat and simmer for 5-10 minutes. In the last 5 minutes of cooking, add the fresh basil.

At this point, the sauce is delicious as is or can be pureed to create a smoother sauce.

Tofu “Ricotta” Filling

Tofu Ricotta

1/2 Pound tofu- blanched

1 clove garlic, smashed, minced

3T extra virgin olive oil

1 heaping T mellow white miso

1t brown rice vinegar

1t ume vinegar

1 heaping T sesame tahini

6c fresh spinach or 1 1/2c steamed and pressed (all water out) OR sautéed with garlic and 1t olive oil

1/2c vegan mozzarella or favorite vegan cheese (or a blend)

1/2t black pepper

In a bowl, crumble or smash the  tofu with a fork or fingers with all of the other ingredients. Add the vegan cheese and the chopped steamed / pressed spinach. Mix well, taste and adjust seasonings.

Gluten Free Double Fudge Brownies

*GF brownie

These are INCREDIBLE….I used pecans, could totally use any other nut or omit it entirely. Really delicious cold from the fridge.  I don’t miss the wheat AT ALL.

Y U M.

Gluten Free Double Fudge Brownies with Pecans 2013

makes 6 large squares or 12 small
3/4c all purpose GF flour
1/2c cocoa powder
3/4c sucanat
1/4c chocolate chips
1/2c pecans or walnuts *optional
1/2t baking powder
1/2t salt
—-
1/4c maple syrup
1/4c coconut oil
1/4c+1T cooked puree of sweet potato*
1t vanilla

Preheat oven to 350º

In a small bowl, mix all of the wet ingredients together, the sweet potato puree*, the maple syrup, canola oil, and vanilla.
In a separate, larger bowl, place all of the dry ingredients; sucanat, chocolate chips, and 1/2 of the nuts if you are using them, and in the same bowl, sift the flour, cocoa powder, baking powder and salt. Sifting isn’t absolutely necessary but it insures there won’t be clumps of flour or worse, chunks of salt, in the batter.
Pour the wet ingredients into the dry and with a spatula mix until everything is well incorporated.
Pour into a greased baking pan; sprinkle the remaining nuts on top.
Bake for 20 minutes. Turn the pan and continue to bake for another 10-13 minutes or until done in the center. Let cool for at least 30 minutes before attempting to cut.

*To make sweet potato puree:
Begin by boiling, steaming or roasting one medium size sweet potato, peeled and cut into pieces. When the sweet potatoes are soft, tender and cooked, place them into the food processor, reserving and using any cooking liquid if the blade is unable to move through the puree smoothly. The end result is a beautiful, smooth, orange puree. Of course you could skip this process entirely and buy organic, canned sweet potatoes.

With a dry measuring cup measure the 1/2c of the puree.

Variations
1) Use carob powder and vegan carob chips in place of the cocoa powder and chocolate chips.
2) Use a teaspoon of peppermint extract in addition to vanilla for a refreshing change. They are delicious!

3) Swirl in Peanut Butter or almond butter!

Sweet Tapioca Pudding

*tapioca pudding

I love this pudding, super creamy, super yummy and super comforting. Play with the flavors by adding chocolate or using coconut milk in place of or in addition to the cashew nut milk. You could use another non-dairy milk but I find the cashews to lend a creaminess and a fullness that another nut or even a soy or rice milk may not offer. SUPER FRICKEN YUM.

Sweet Tapioca Pudding

 3-1/2c cashew nut milk

¼c agave syrup or organic cane sugar

1/4c Organic Tapioca Pearls

1/4t pink salt

1t vanilla

In a smallish pot, place all of the ingredients except the vanilla and bring to a gentle boil, stirring often as to prevent the pearl from sticking to the bottom of the pot. Reduce the heat and simmer for 10-15 minutes or until most of the milk has been absorbed, the pudding has thickened and gotten creamy and the pearls have lost their opaqueness. Stir in the vanilla and turn off the heat and let steam, covered for 10 minutes or so. Remove to a glass container or serving bowl and refrigerate until completely cooled.

*Use coconut milk in place or in addition to the cashew nut milk for a delicious variation